# PlayCanvas Leaderboard minimal example
Leaderboards allow players to compare their performance against others, increasing engagement time and replayability. VIVERSE's Leaderboard SDK can be combined with PlayCanvas' powerful screen- and screen-space Element UI systems to provide an end-to-end solution for this in your game.
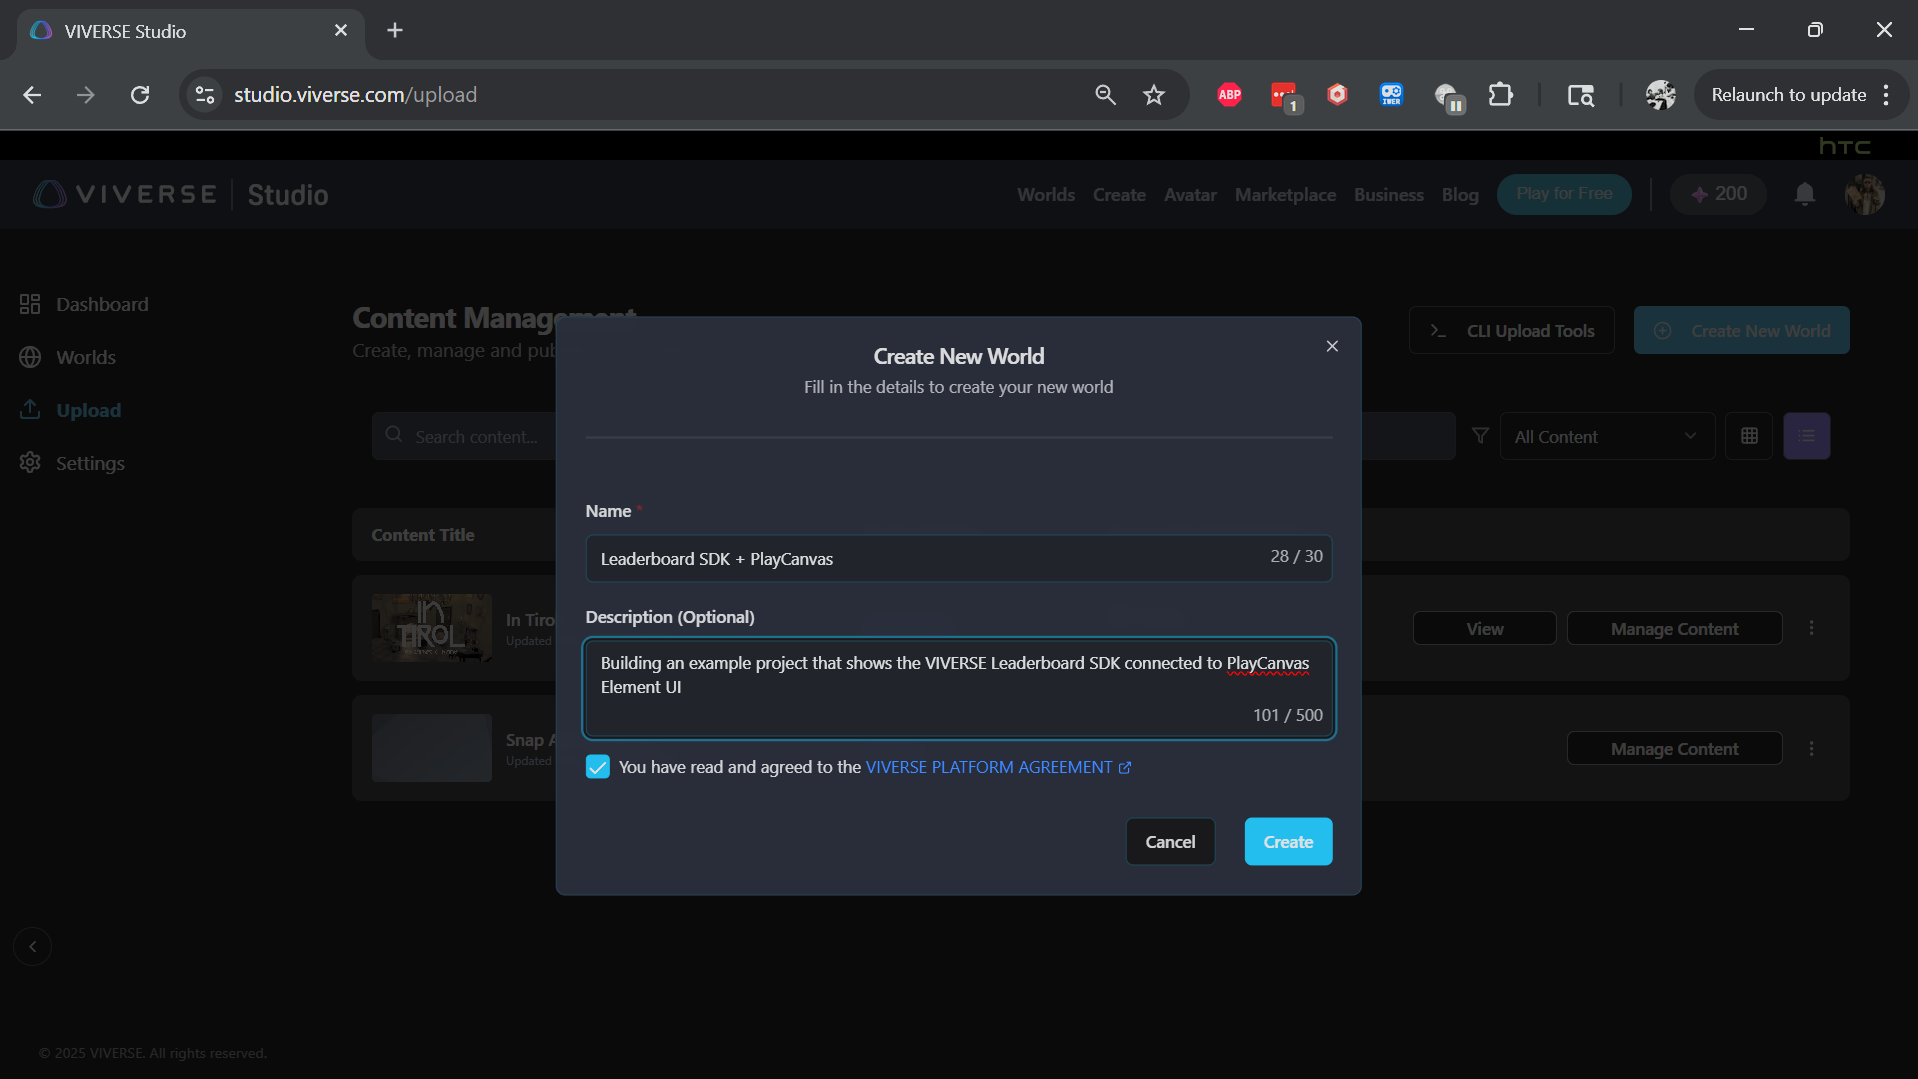
### Pre-requisite #1: Create a World, App ID and Leaderboard in VIVERSE Studio
All SDK usage requires an App ID tied to a specific VIVERSE World, which can be created via [VIVERSE Studio](https://studio.viverse.com/upload). This process is described in detail in [our documentation on VIVERSE Studio](https://app.gitbook.com/s/4pMiThqqrBzfvP8uy5am/publishing-with-your-viverse-account).
> ***NOTE:** because VIVERSE SDKs require an App ID, this means VIVERSE SDKs cannot be used with projects published via the PlayCanvas Create SDK extension, which do not have App IDs.*
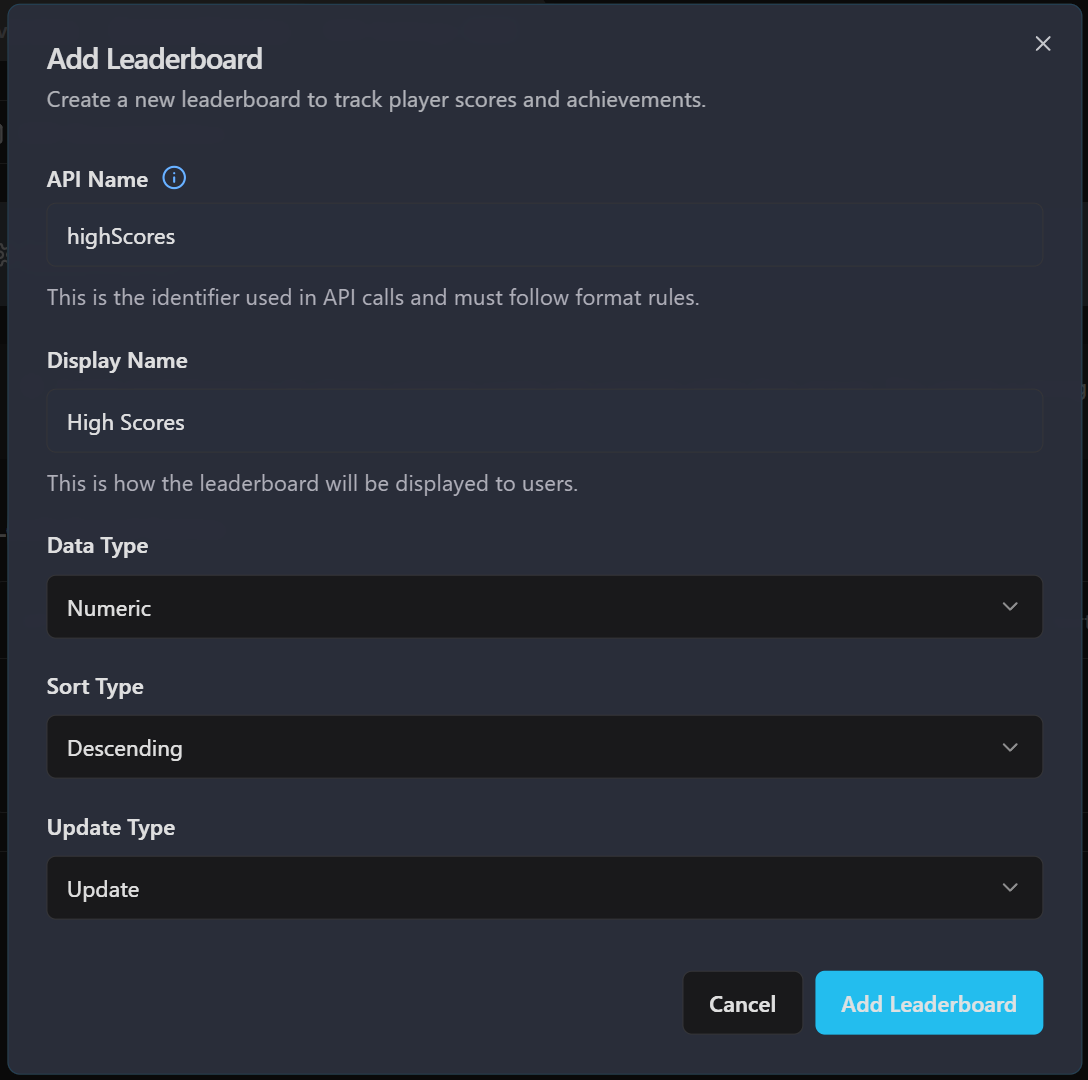
After creating your world, navigate to its "SDK Settings" tab, and click Add New Leaderboard. In the Leaderboard Configuration section, define the necessary leaderboard parameters for this world.
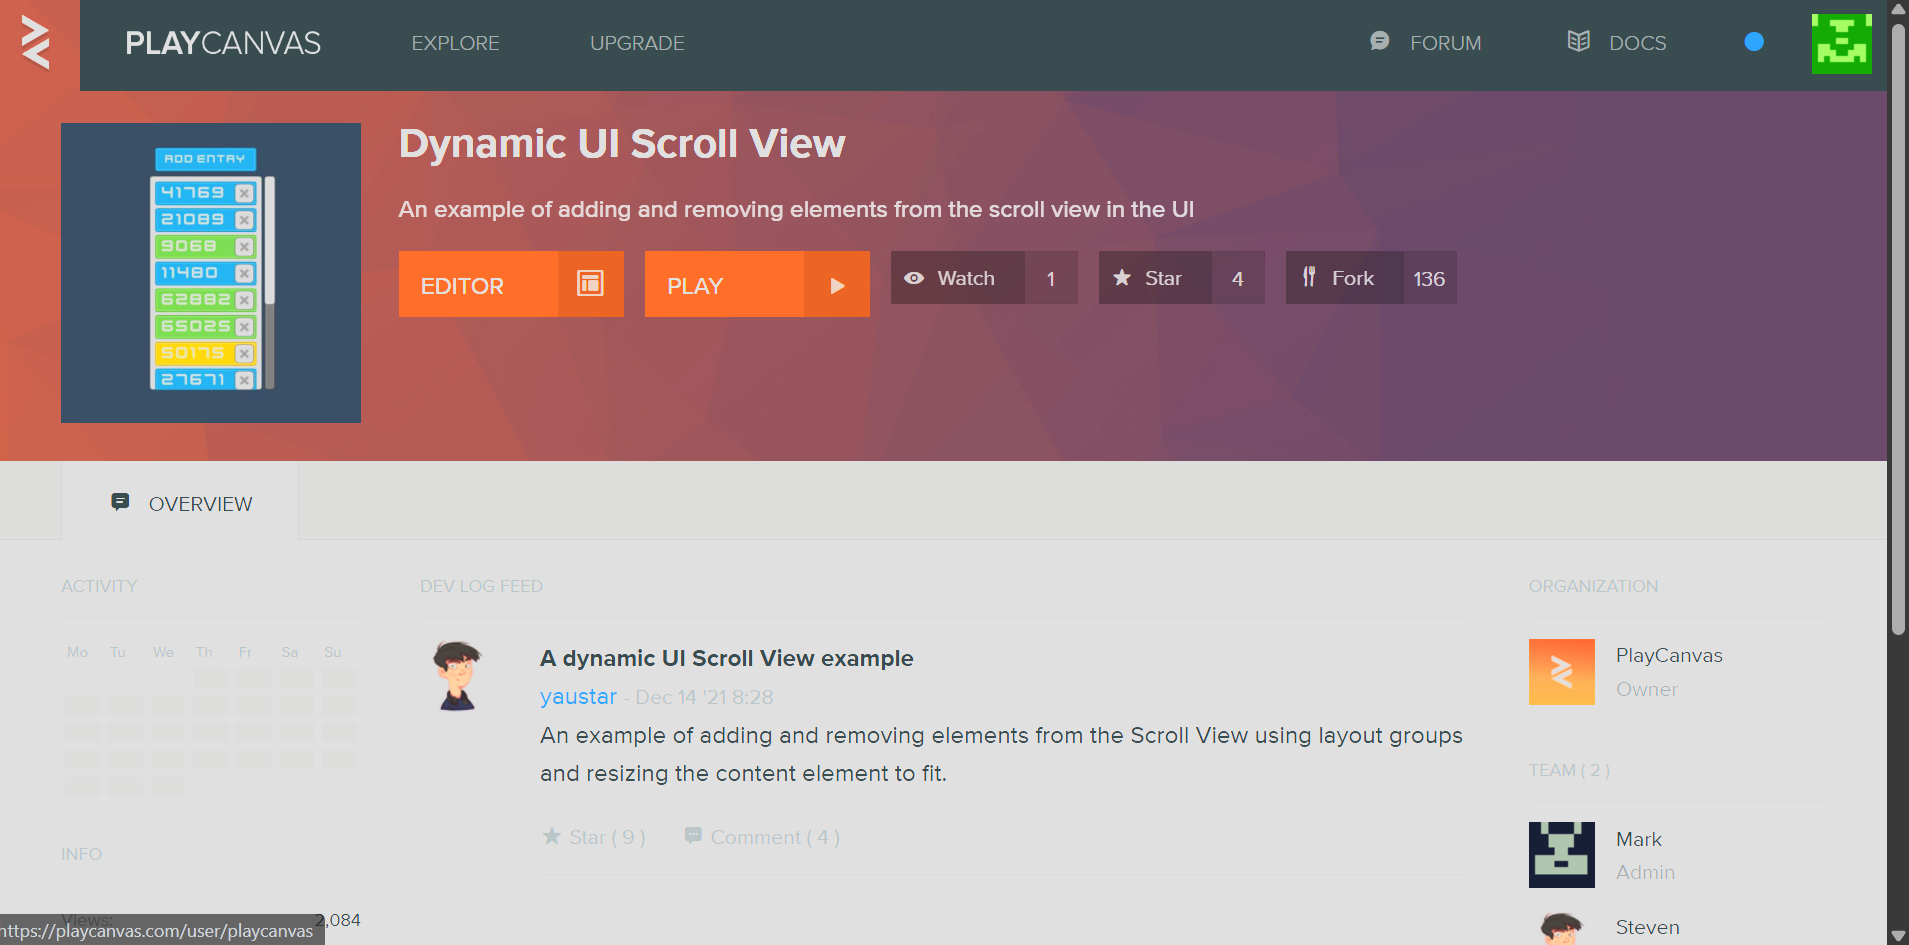
### Pre-requisite #2: Clone the PlayCanvas Scrolling UI tutorial
PlayCanvas already maintains many great tutorials for their engine, including a scrolling UI system with dynamic sizing. We'll click the 🍴 Fork button to clone this project to use [as a starting point](https://docs.viverse.com/developer-tools/leaderboard-sdk/broken-reference) and ensure our UI practices are standard for the engine. This already has a few scripts for adding UI entries to a list based on a PlayCanvas template.
### Step 1: Add the VIVERSE SDK as an external script
Once the project is forked, go to the new project Settings in the PlayCanvas editor, and in the EXTERNAL SCRIPTS menu, add one URL entry, and point to [`https://www.viverse.com/static-assets/viverse-sdk/index.umd.cjs`](https://www.viverse.com/static-assets/viverse-sdk/index.umd.cjs) as in this screenshot. This will ensure the VIVERSE SDK is loaded first and that your PlayCanvas logic has full access to its global methods.
Initially, we'll also increase the width of the UI column to allow for displaying names, and I'll replace the "Add Entry" UI button on top with a simple label that says "High Scores".
### Step 2: Login and Auth
The player must be logged into VIVERSE to either request leaderboard data or to submit it. So this example first checks if the user is logged in, and if not, forces login through VIVERSE's "single sign-on" (SSO) redirect loop.
We'll add a new script called `leaderboard.mjs` to manage the VIVERSE SDK services and handle authentication. These code comments also explain the significance of each line, but this process is described in detail in our documentation, [**Login & Authentication for the SDK**](https://docs.viverse.com/developer-tools/login-and-authentication-for-the-sdk), as well.
```javascript
import { Script, Entity } from "playcanvas";
export class Leaderboard extends Script {
static scriptName = "leaderboard";
initialize() {
// Log globalThis for reference - the VIVERSE SDK relies on it
console.log("globalThis", globalThis);
// Call the VIVERSE SDK init logic defined below in this component
this.loadViverse();
}
async loadViverse() {
// Create a new viverseClient instance on globalThis
globalThis.viverseClient = new globalThis.viverse.client({
clientId: '9dbensqh9g', // the App ID from VIVERSE Studio described above
domain: 'account.htcvive.com', // HTC Account domain
});
// check login status again
const result = await globalThis.viverseClient.checkAuth();
if (result === undefined) { // undefined means not logged in
// This will cause a refresh and forward to the VIVERSE login process
globalThis.viverseClient.loginWithWorlds();
} else { // `result` contains credentials to make authorized requests
console.log("auth result!", result)
}
}
}
```
### Step 3: Set up the VIVERSE \`gameDashboardClient\`
Now we should have valid credentials to make requests to the Leaderboard SDK. Let's add the `gameDashboardClient` using our access token, then write a function to fetch high scores from the Leaderboard SDK.
```javascript
// Continued from above
} else { // `result` contains credentials to make authorized requests
// Get the token to start making requests;
const accessToken = await globalThis.viverseClient.getToken();
// Start the leaderboard init process by creasting a gameDashboardClient instance
globalThis.gameDashboardClient = new globalThis.viverse.gameDashboard({
baseURL: 'https://www.viveport.com/',
communityBaseURL: 'https://www.viverse.com/',
token: accessToken
});
// Immediately fetch high scores if logged in and gameDashboardClient was created
this.getHighScores();
}
}
```
### Step 4: Fetch high scores and tie response to PlayCanvas UI elements
Now we should call `getLeaderboard()` with a valid config object, get a [Leaderboard Response](https://docs.viverse.com/developer-tools/leaderboard-sdk/..#leaderboard-response-object) back, then tie that data into our PlayCanvas UI.\
\
One we have a response, the Dynamic UI Scrolling View tutorial already contains UI elements for a scrollable list of score values of arbitrary length, including an event to spawn a new instance of a "score" value with template UI. I modified the base template to include a left-aligned text element for the player's name, and a right-aligned text element for score, and fired the `addScoreEntry` event containing that data.
```javascript
async getHighScores() {
// A valid leaderboard config example:
const config = {
name: "highScores", // should match the name set in SDK Settings menu
range_start: 0, // get first place
range_end: 100, // all the way to rank 100
region: "global",
time_range: "alltime",
around_user: false
};
// Again the App ID is required
const leaderboardResponse =
await globalThis.gameDashboardClient.getLeaderboard('9dbensqh9g', config);
// Clear high scores before displaying new leaderboard data
this.clearHighScores()
// Have the scrollController add a new entry according to this ranking
leaderboardResponse.ranking.forEach((ranking) => {
this.scrollControllerEntity.fire('addScoreEntry', ranking);
})
}
clearHighScores() {
// Clear leaderboard entries - i.e. all the children under the contentEntity
for (let i = this.contentEntity.children.length - 1; i >= 0; i--) {
console.log("destroying child: ", this.contentEntity.children[i])
this.contentEntity.children[this.contentEntity.children.length-1].destroy();
}
}
```
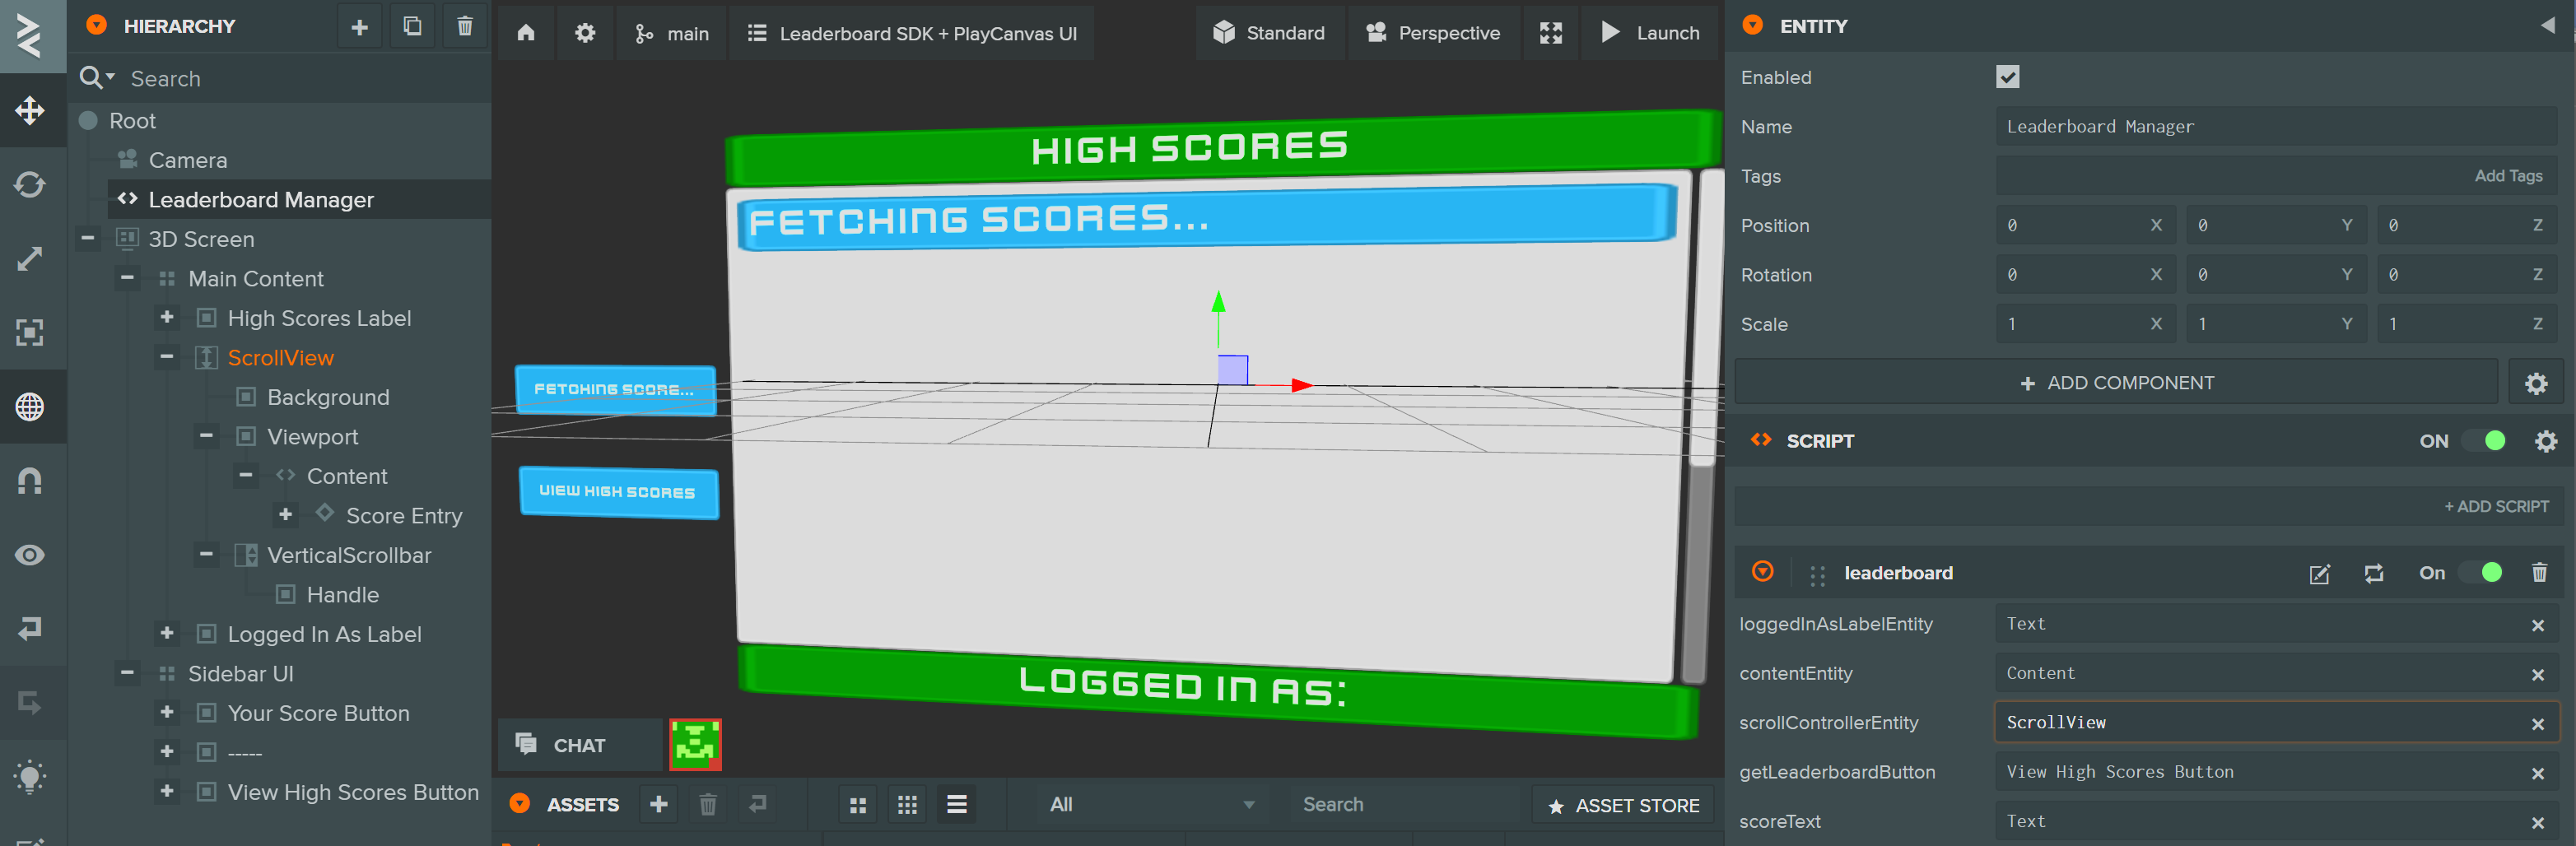
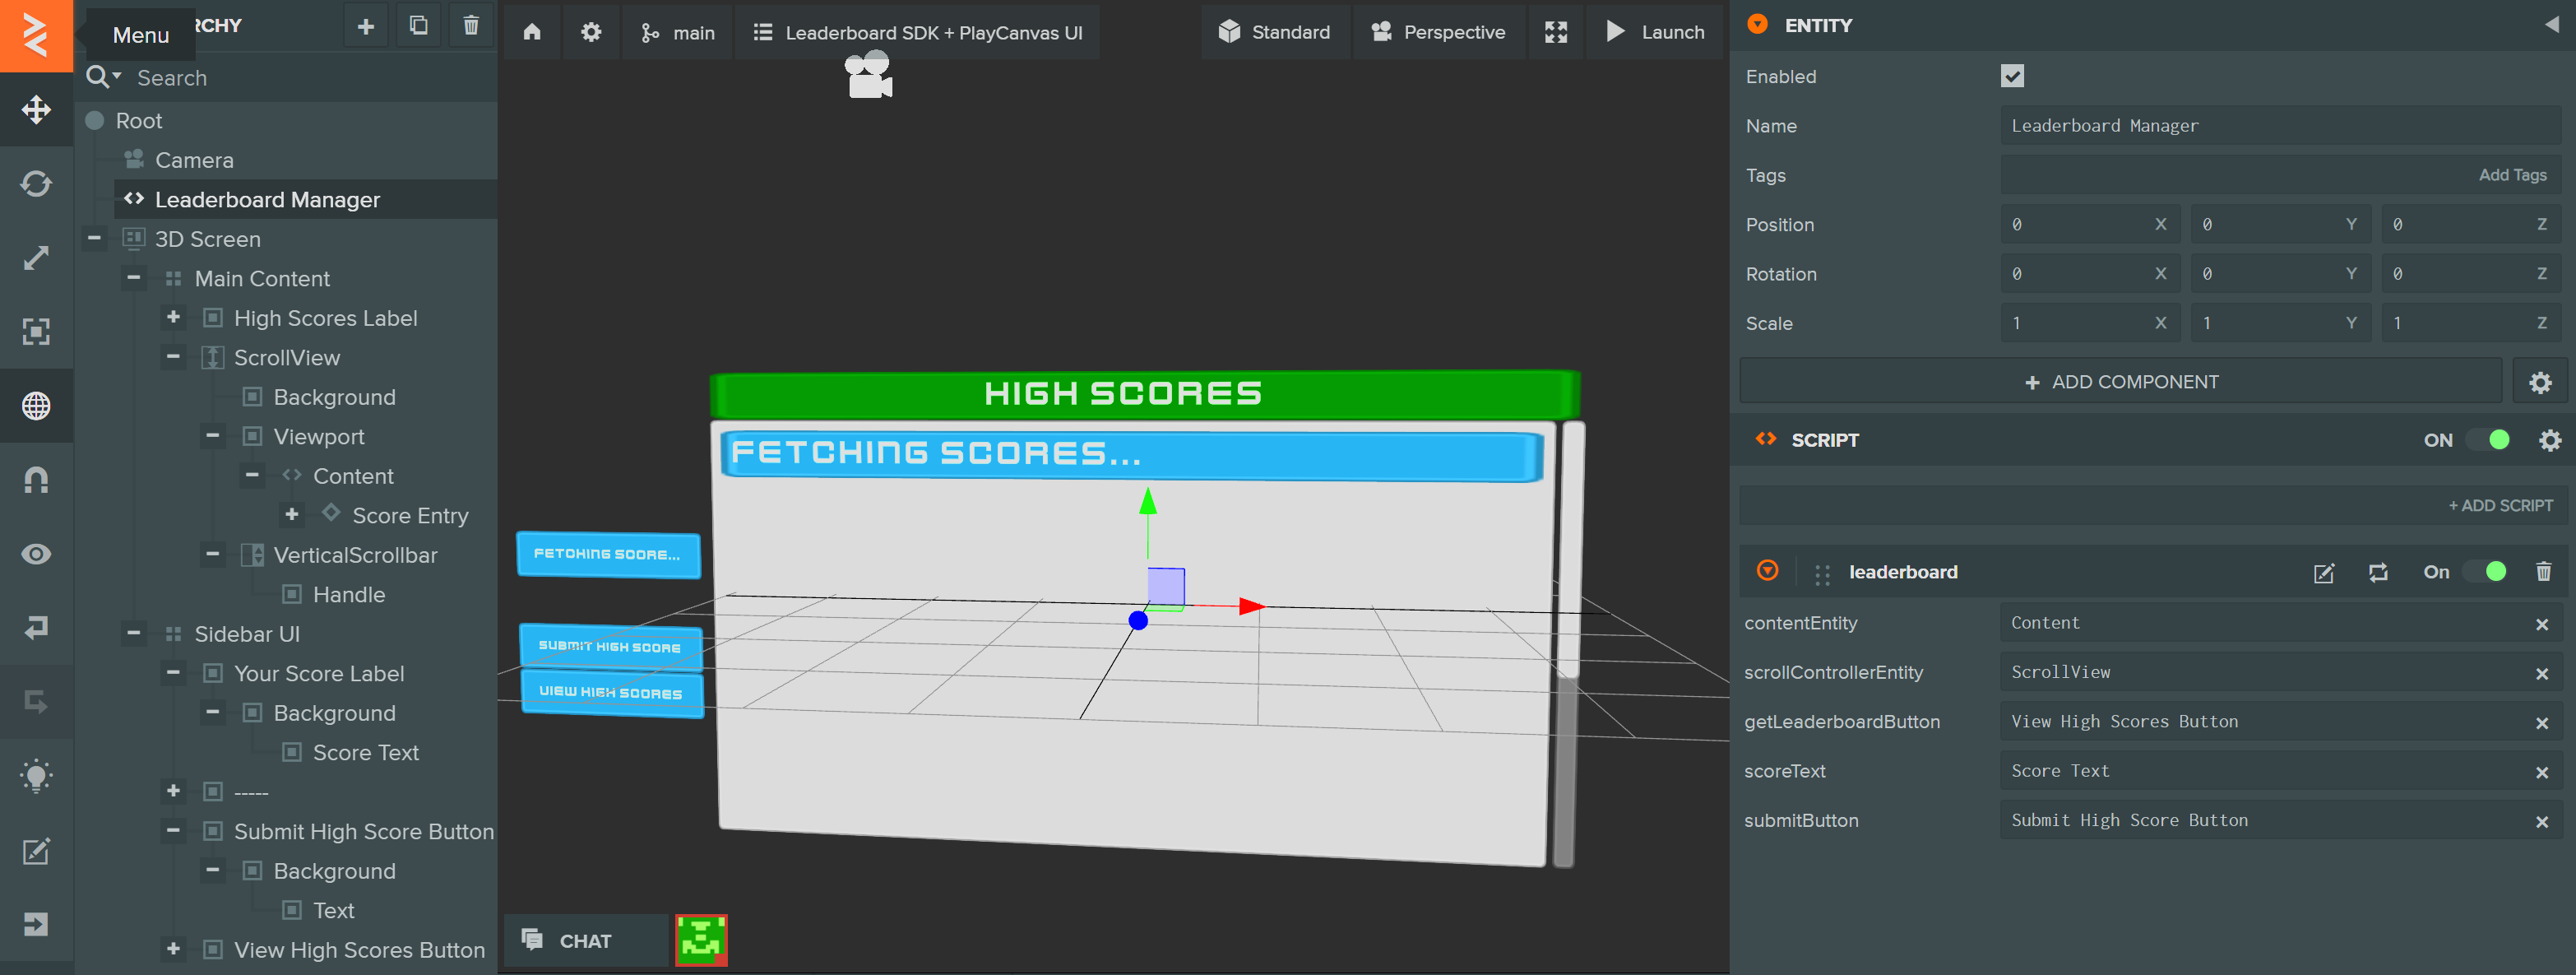
To summarize, we fire `this.getHighScores()` on button click, and reference the button by attribute as `this.getLeaderboardButton`. `this.scrollControllerEntity` is another attribute reference set in the editor, responsible for spawning new score entries. And `this.contentEntity` is one of its children that will contain all UI template instances. We reference each of these in our scripting and in the editor like so:
```javascript
/**
* @attribute
* @type {Entity}
*/
contentEntity;
/**
* @attribute
* @type {Entity}
*/
scrollControllerEntity;
/**
* @attribute
* @type {Entity}
*/
getLeaderboardButton;
```
Then add the click callback in the editor, anywhere within the `initialize()` lifecycle hook, to run the `this.getHighScores()` function we defined above.
```javascript
this.getLeaderboardButton.button.on("click", () => {
this.getHighScores()
});
```
With those references set, we're getting leaderboard data on click, then firing the `addScoreEntry` event on every ranked score returned in the [Leaderboard Response](https://docs.viverse.com/developer-tools/leaderboard-sdk/..#leaderboard-response-object) according to the request configuration!
The PlayCanvas demo we forked already includes an event listener that spawns a new UI element template, which we can modify slightly to handle our leaderboard data structure:
```javascript
ScrollController.prototype._onAddEntry = function (rank) {
var randomIndex = Math.floor(pc.math.random(0, this.entryTemplateAssets.length));
var template = this.entryTemplateAssets[randomIndex];
var instance = template.resource.instantiate();
// "Score Text" is the right-aligned text element set in the UI template
var scoreEntity = instance.findByName('Score Text');
scoreEntity.element.text = rank.value;
// "Name Text" is the left-aligned text element set in the UI template
var nameEntity = instance.findByName('Name Text');
nameEntity.element.text = (rank.rank + 1) + ". " + rank.name;
instance.reparent(this._content);
};
```
We'll leave one instance of the score entry UI template in the scene on initialization, and change its text value from blank to "Fetching scores..." — this entry will be cleared as soon as actual scores are returned from the SDK. We can add a button to run this `getHighScores()` function on click, as well.
### Step 5: Submit a score
That should function well, but until we submit some high scores, the list will return empty and nothing will display! Let's add another button to "Submit Score," reference it with an attribute in our script, and set a click callback.
```javascript
update(dt) {
this.score++; // Score goes up 1 every tick
// Set the PlayCanvas UI element text to the current score
this.scoreText.element.text = this.score.toString();
}
async handleSubmit() {
this.clearHighScores()
// You can upload multiple leaderboard scores to multiple leaderboards at once
const scores = [
{ name: "highScores", value: this.score.toString() },
];
await globalThis.gameDashboardClient.uploadLeaderboardScore(this.appId, scores)
// Fetch high scores again because the list doesn't refresh automatically
this.getHighScores()
}
```
This requires adding two more attribute references and setting them in the editor:
```javascript
/**
* @attribute
* @type {Entity}
*/
scoreText;
/**
* @attribute
* @type {Entity}
*/
submitButton;
```
Then add another click callback in `leaderboard.mjs` — and again, it can be anywhere within the `initialize()` lifecycle hook.
```
this.submitButton.button.on("click", () => {
this.handleSubmit()
});
```
### Step 6: Export and Publish to VIVERSE
That's it! That should fulfil our minimal requirements to use the VIVERSE Leaderboard SDK along with PlayCanvas UI. Now we just need to export and publish.
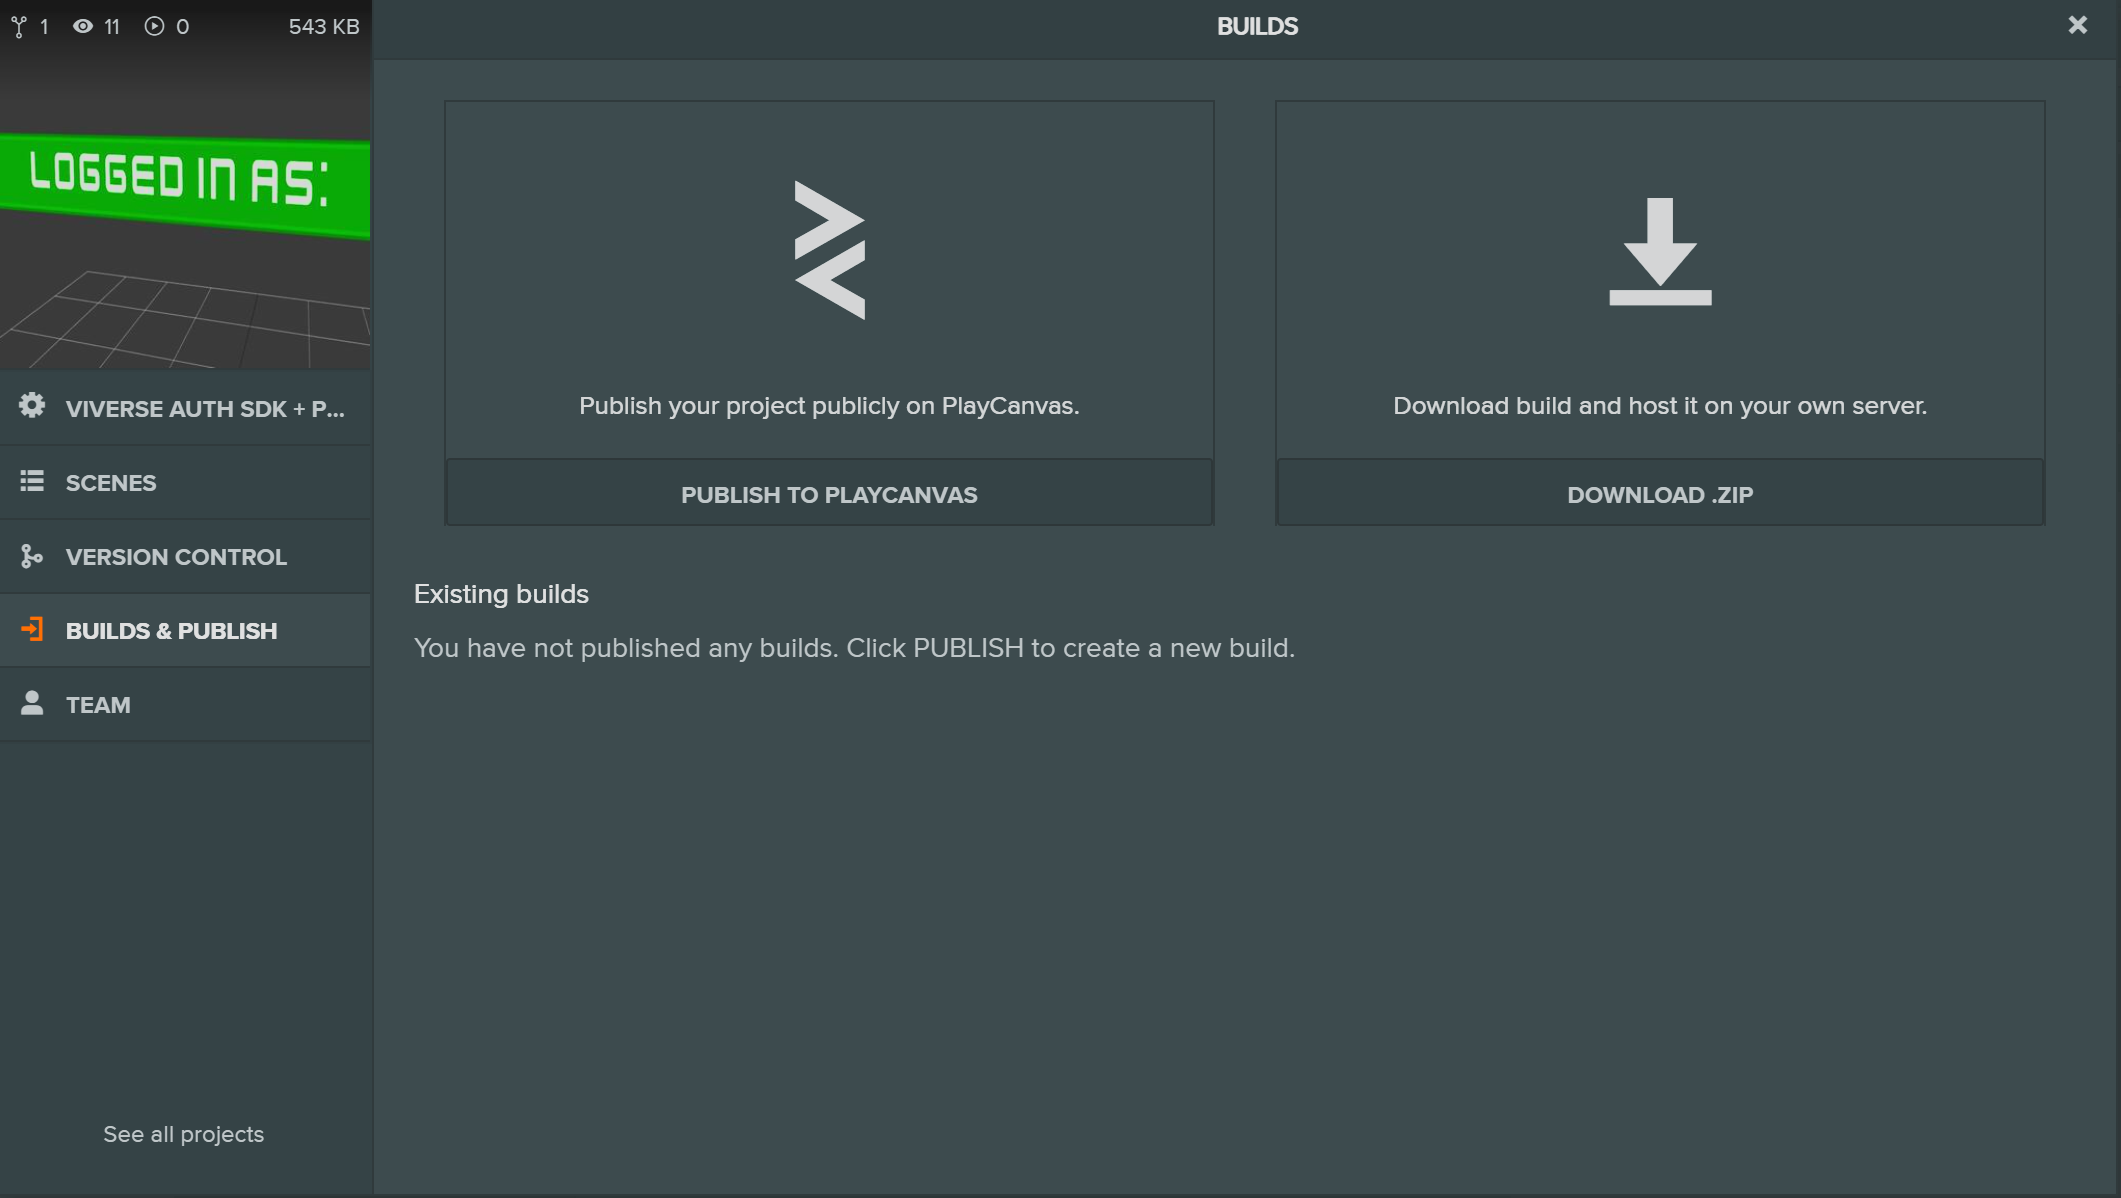
In PlayCanvas' Publish/Download menus, choose the "DOWNLOAD ZIP," then set your export options and click the first grey "DOWNLOAD," which will prepare you a build, exposing the final orange "DOWNLOAD" button after a few seconds.
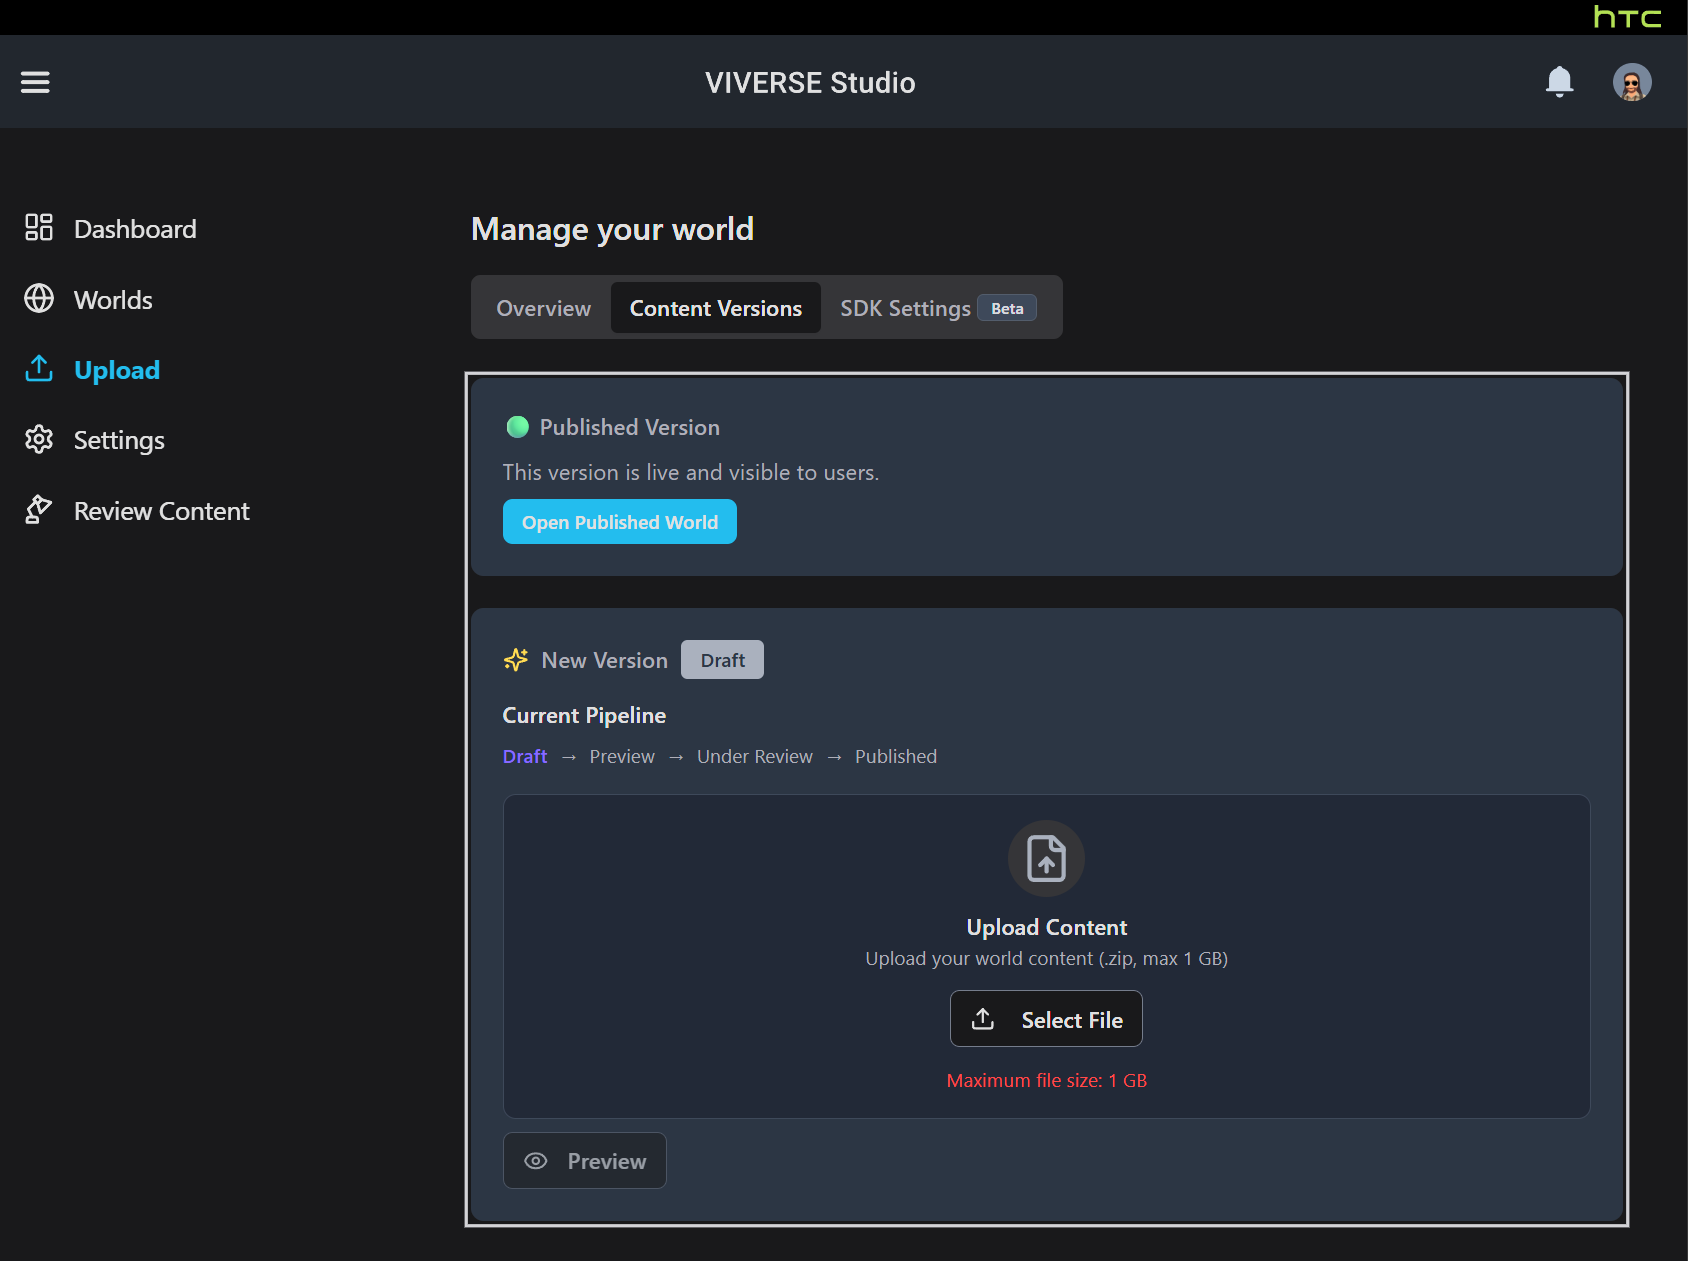
Once the build .zip is downloaded, navigate to VIVERSE Studio's Upload section, click "Manage Content" next to the app you created earlier, and use the "Upload Content" section to select the .zip.
From there, you can preview your build, or submit it for content review and approval. This process is explored in great detail in [the VIVERSE Studio section](https://app.gitbook.com/s/4pMiThqqrBzfvP8uy5am/publishing-with-your-viverse-account) of our docs if you have further questions.
### Final Build
The build is ready. Here are the relevant links:
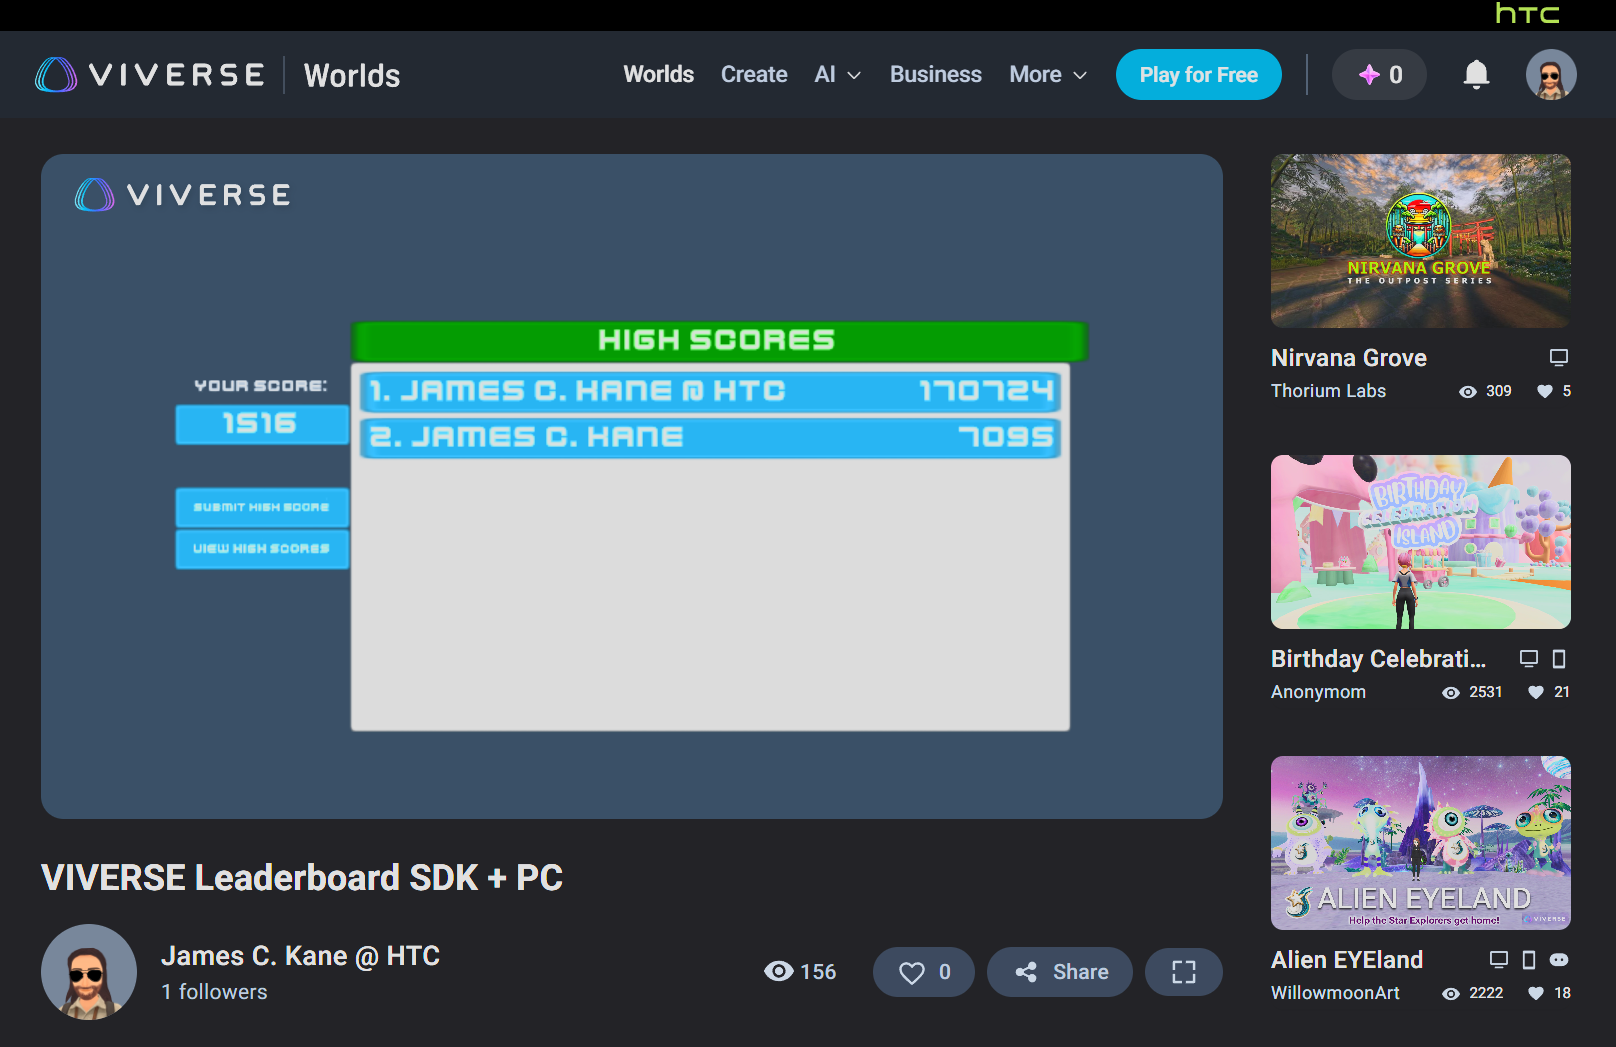
Public PlayCanvas project:
Demo scene live on VIVERSE: